Ok, so, using the data found here by @Mayumichi:
I was then able to work things out for maximum yield like this:
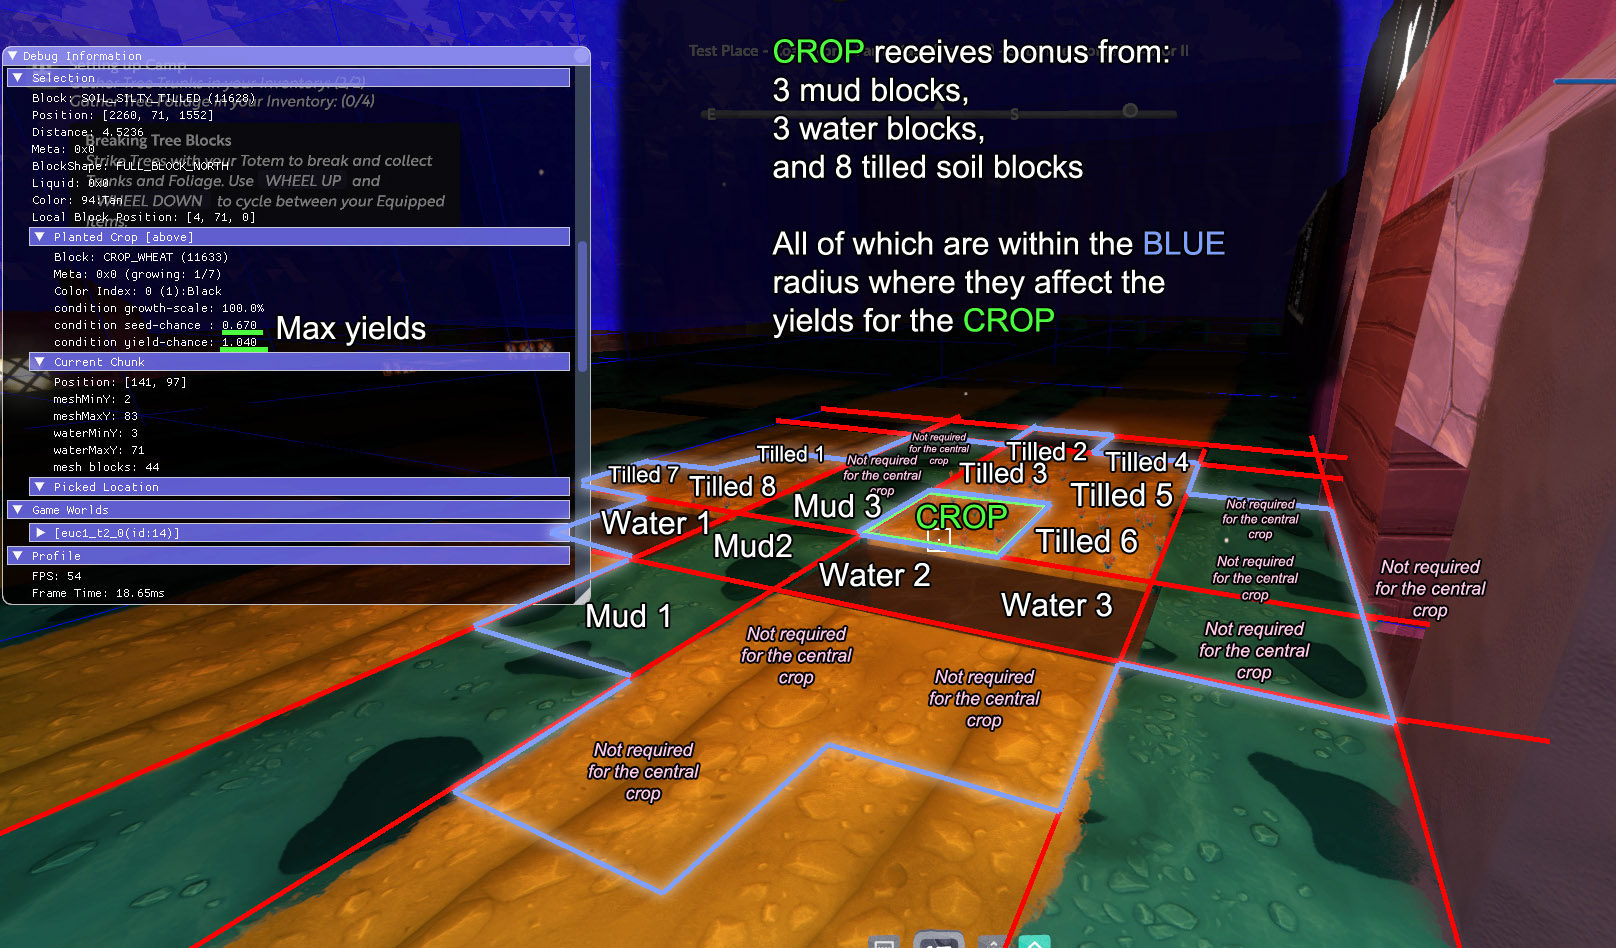
Basically, the central crop here will receive a bonus to its yields for having up to 3 water blocks, up to 3 mud blocks and up to 8 extra tilled soil blocks within the blue radius.
All the other blocks within the radius, the ones marked as “not required”, can be whatever you want, but this layout means that all the crops in those tilled soils will receive bonuses up to the maximum, as far as I was able to plan.
If, for example, you only have 2 water blocks and 1 mud block and 4 extra tilled soil blocks around the central crop, then you will get a crop that is not maxed in its yields, but that will grow and bear fruit anyway.
Let me know if more explanations are required or if there are more questions.
Edit: Small clarification on something I overlooked/forgot to mention when putting this together. Currently, the bonus/benefit to the central crop can only be attained within this radius, if the blocks are on the same horizontal level.
This means that blocks at the same height as the actual plant or below the soil will have no effect. I have reported this elsewhere in my initial findings investigating this mechanic, though I forget where that post is exactly.