I was wondering, similar to the two extensive gleam/block colour charts (that I know of! thanks for those, by the way!), is there anyone that made an easy understandable crop and seed farming guide yet? Despite following the (which I find rather confusing) seed tooltip - I never really get the optimal crop or seed result and basically farm at a loss. Though I have been sticking to simple layouts like this:
++++++++++
+00000000+
+00000000+
++++++++++
(+ being the “near” block plus liquid and 0 being the crop)
But for some crops that doesn’t seem to work and I am no maths or logic genius so I struggle coming up with the right “patterns” for farming.
Any help would be highly appreciated. Has anyone made a guide yet, please link! I’ve been searching for farming etc but usually land in posts relating to naturally occuring sponge, tangle or meteor farming which is not what I am looking for.
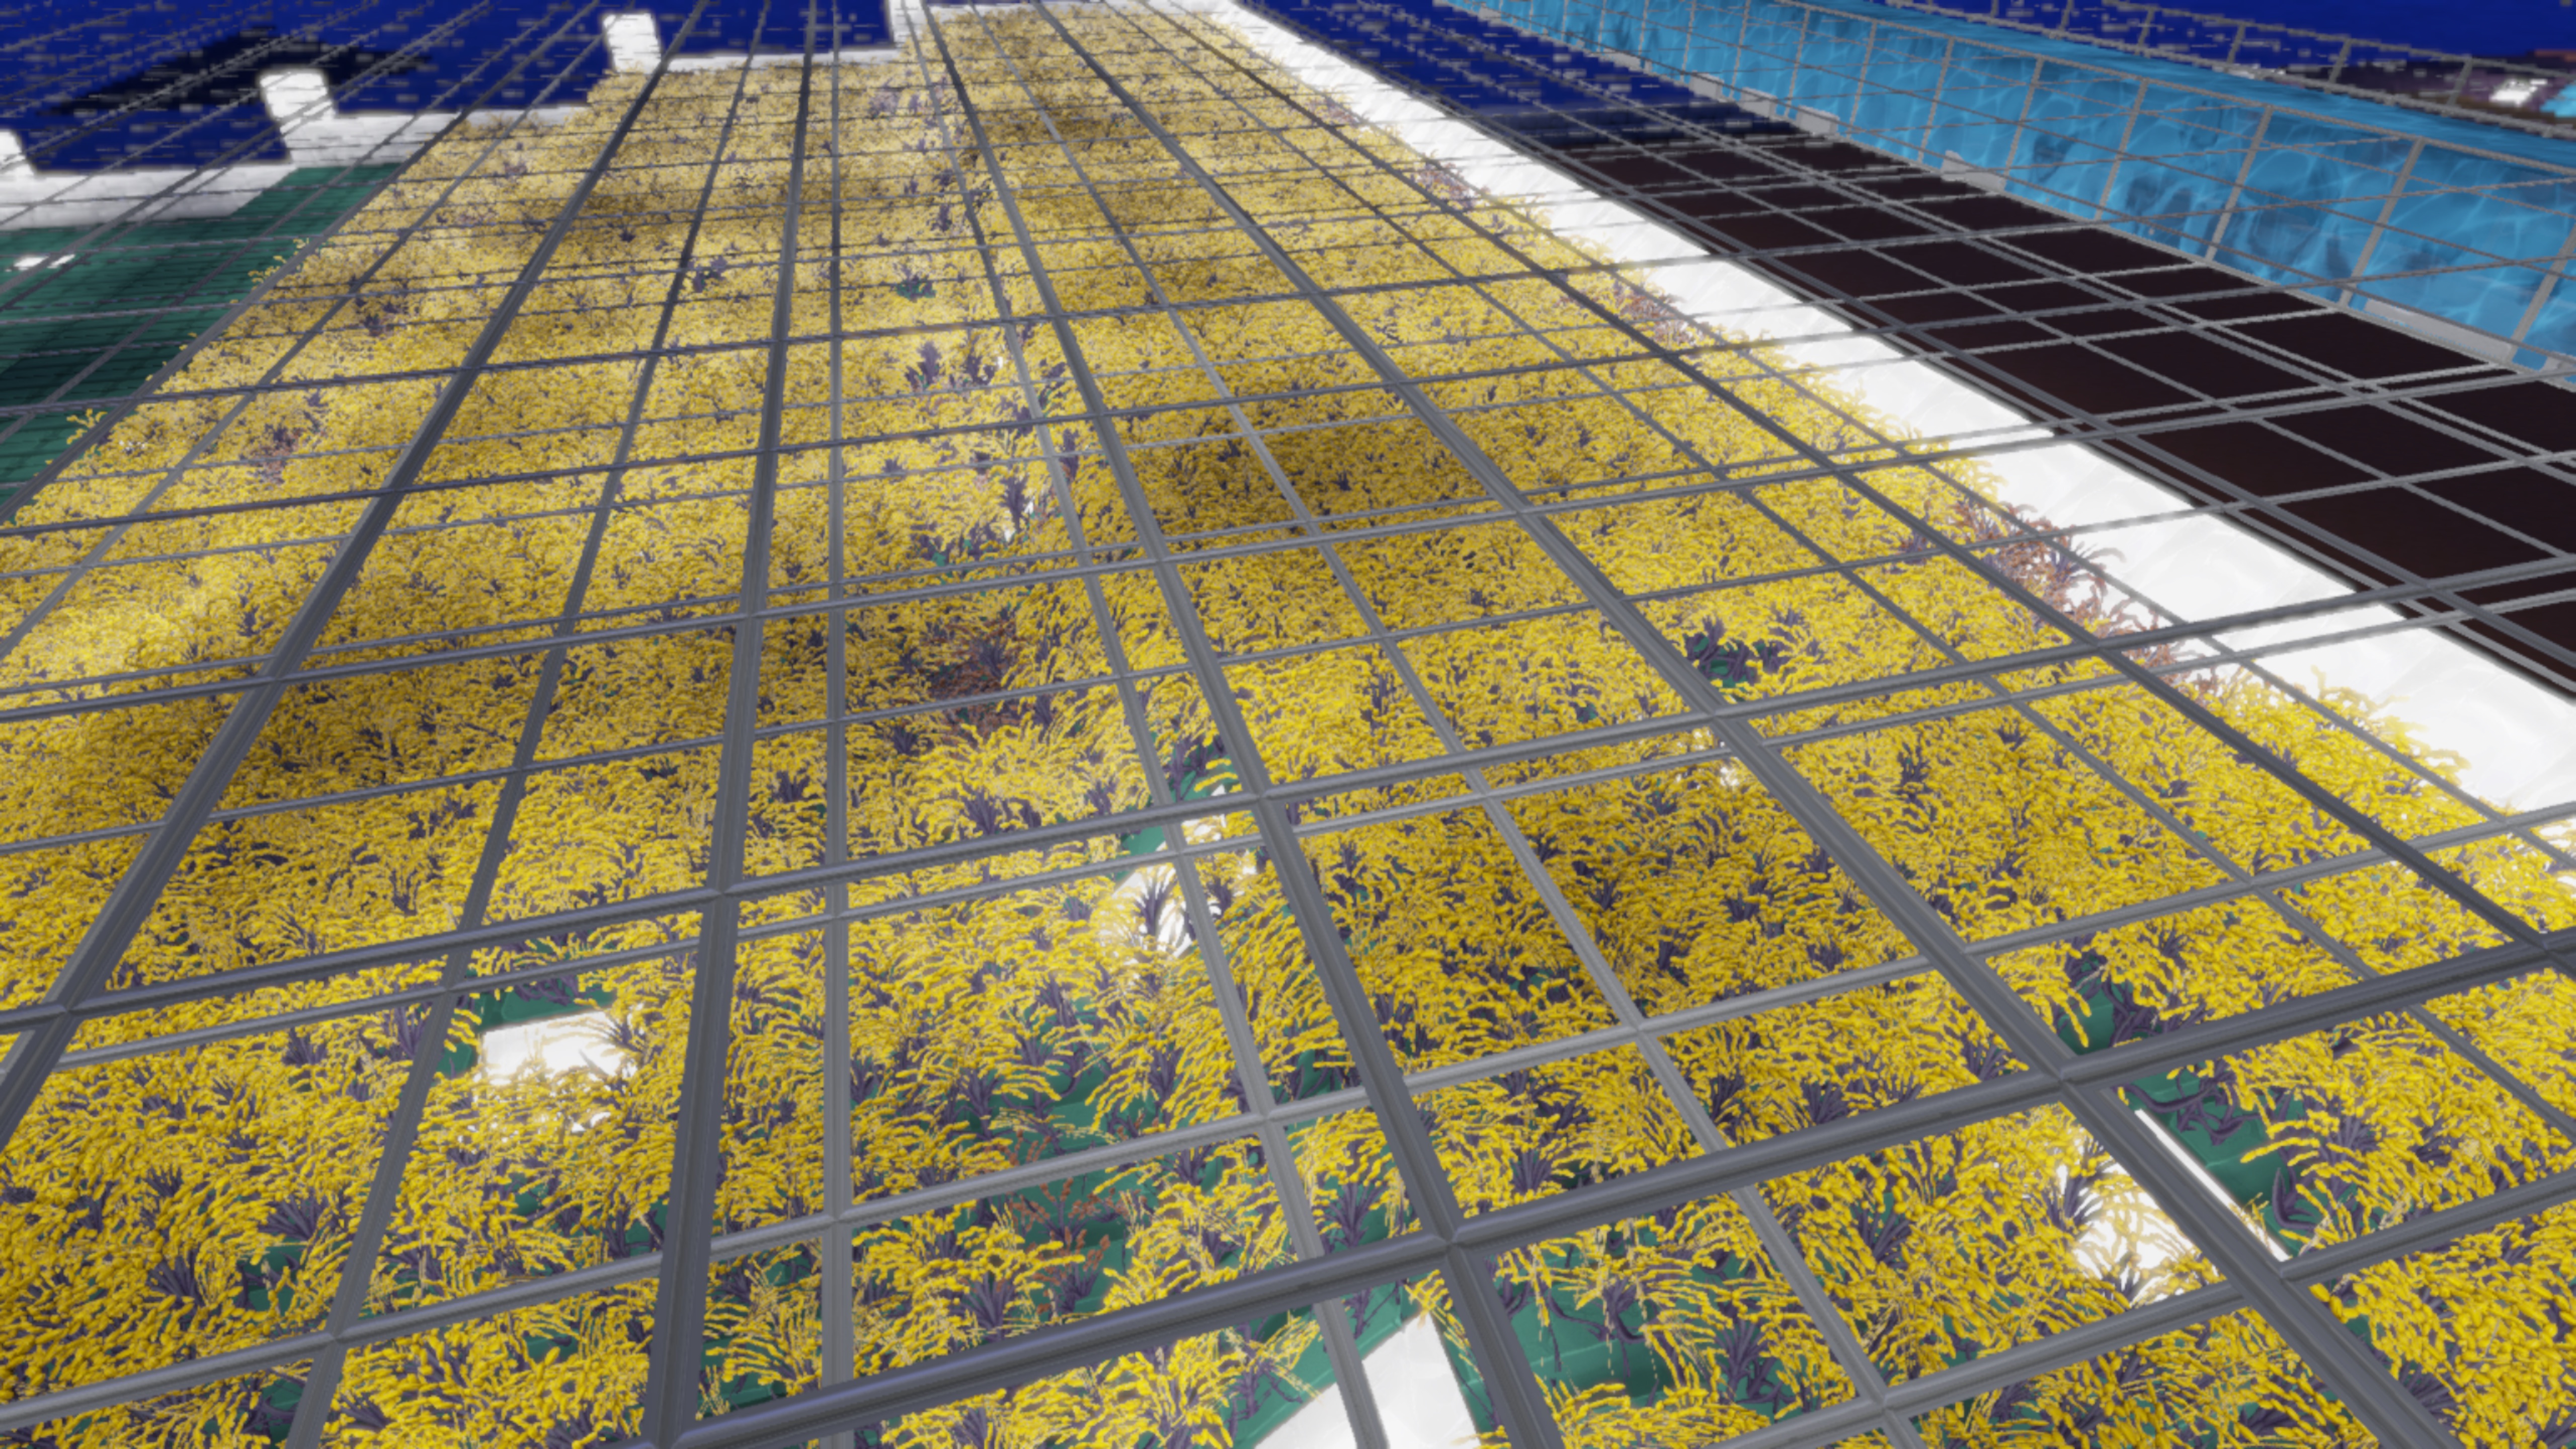
It’s basically a plot 31x190 consisting of compact clay blocks. I have an aqueduct extending the length of the plot to provide running water when needed. Optimized for crop yield at 100% and seed yield at 115%.
Oh wow, they are massive!! Thanks @Vansten and @SolidAtomic. I didn’t realise you can make it that big without an issue.
Do the “nearby” blocks have to be next to it or can they be under it as well? What it says “near” a block, how far is “near”? One block? Two blocks?
It seems like this is another rather complicated feature of the game, same as - in my opinion - forging, where one basically has to get a PhD in Boundless game mechanics to understand how it works (slightly exaggerating, but you get my idea). I feel a bit lost. It could be such a nice feature but I just don’t seem to get around the field setup. A bit frustrating.
Is it also normal that the tilling disappears randomly when the crops is being collected?
Its roughly a diamond shape around the crops. (image from Mayumichi/Pfiffel)
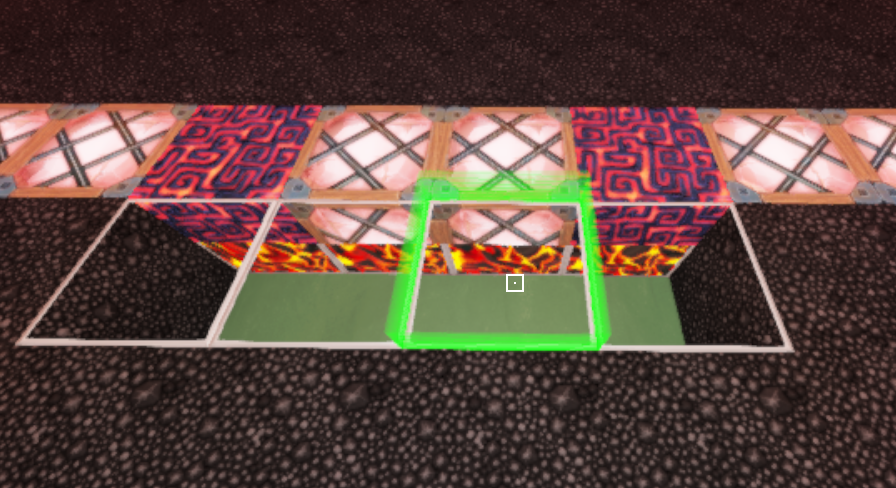
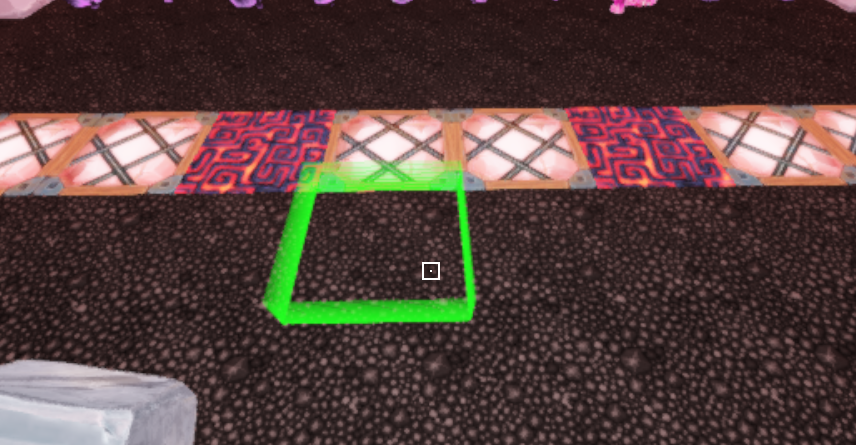
The blocks need to be on the same level as the block its planted on, but its possible to chisel a block in half and then place lava on the bottom half, with the block itself being on the top half, essentually having both lava and the block on the same space, which is what i did with the corruption and lamps.
OK, you confused me even more now and the more I look at the screenshot, the worse it gets.
Your lamps look like half blocks and your corruption look like half blocks or is that because the screenshot is warped? You can’t combine two half blocks, can you?! The lamps on the side look full size compared to the corruption and lamps inbetween. Did I miss a major feature of that game?!
Ah, FoV… didn’t think of that, that makes sense!!!
Thanks for clarifying, much appreciated. I wished some game mechanics wouldn’t make me feel like I am a total dumb-a**. sigh
I have planned to make an extensive goo and color mixing guide but it will take time like a few months. Hopefully no one beats me to it before then wink * wink*
Virtual, I have all the math sorted, I just need viable / possible seed and crop yield combinations then I can tell you what works best for which situation (colour change or just pigment farming).
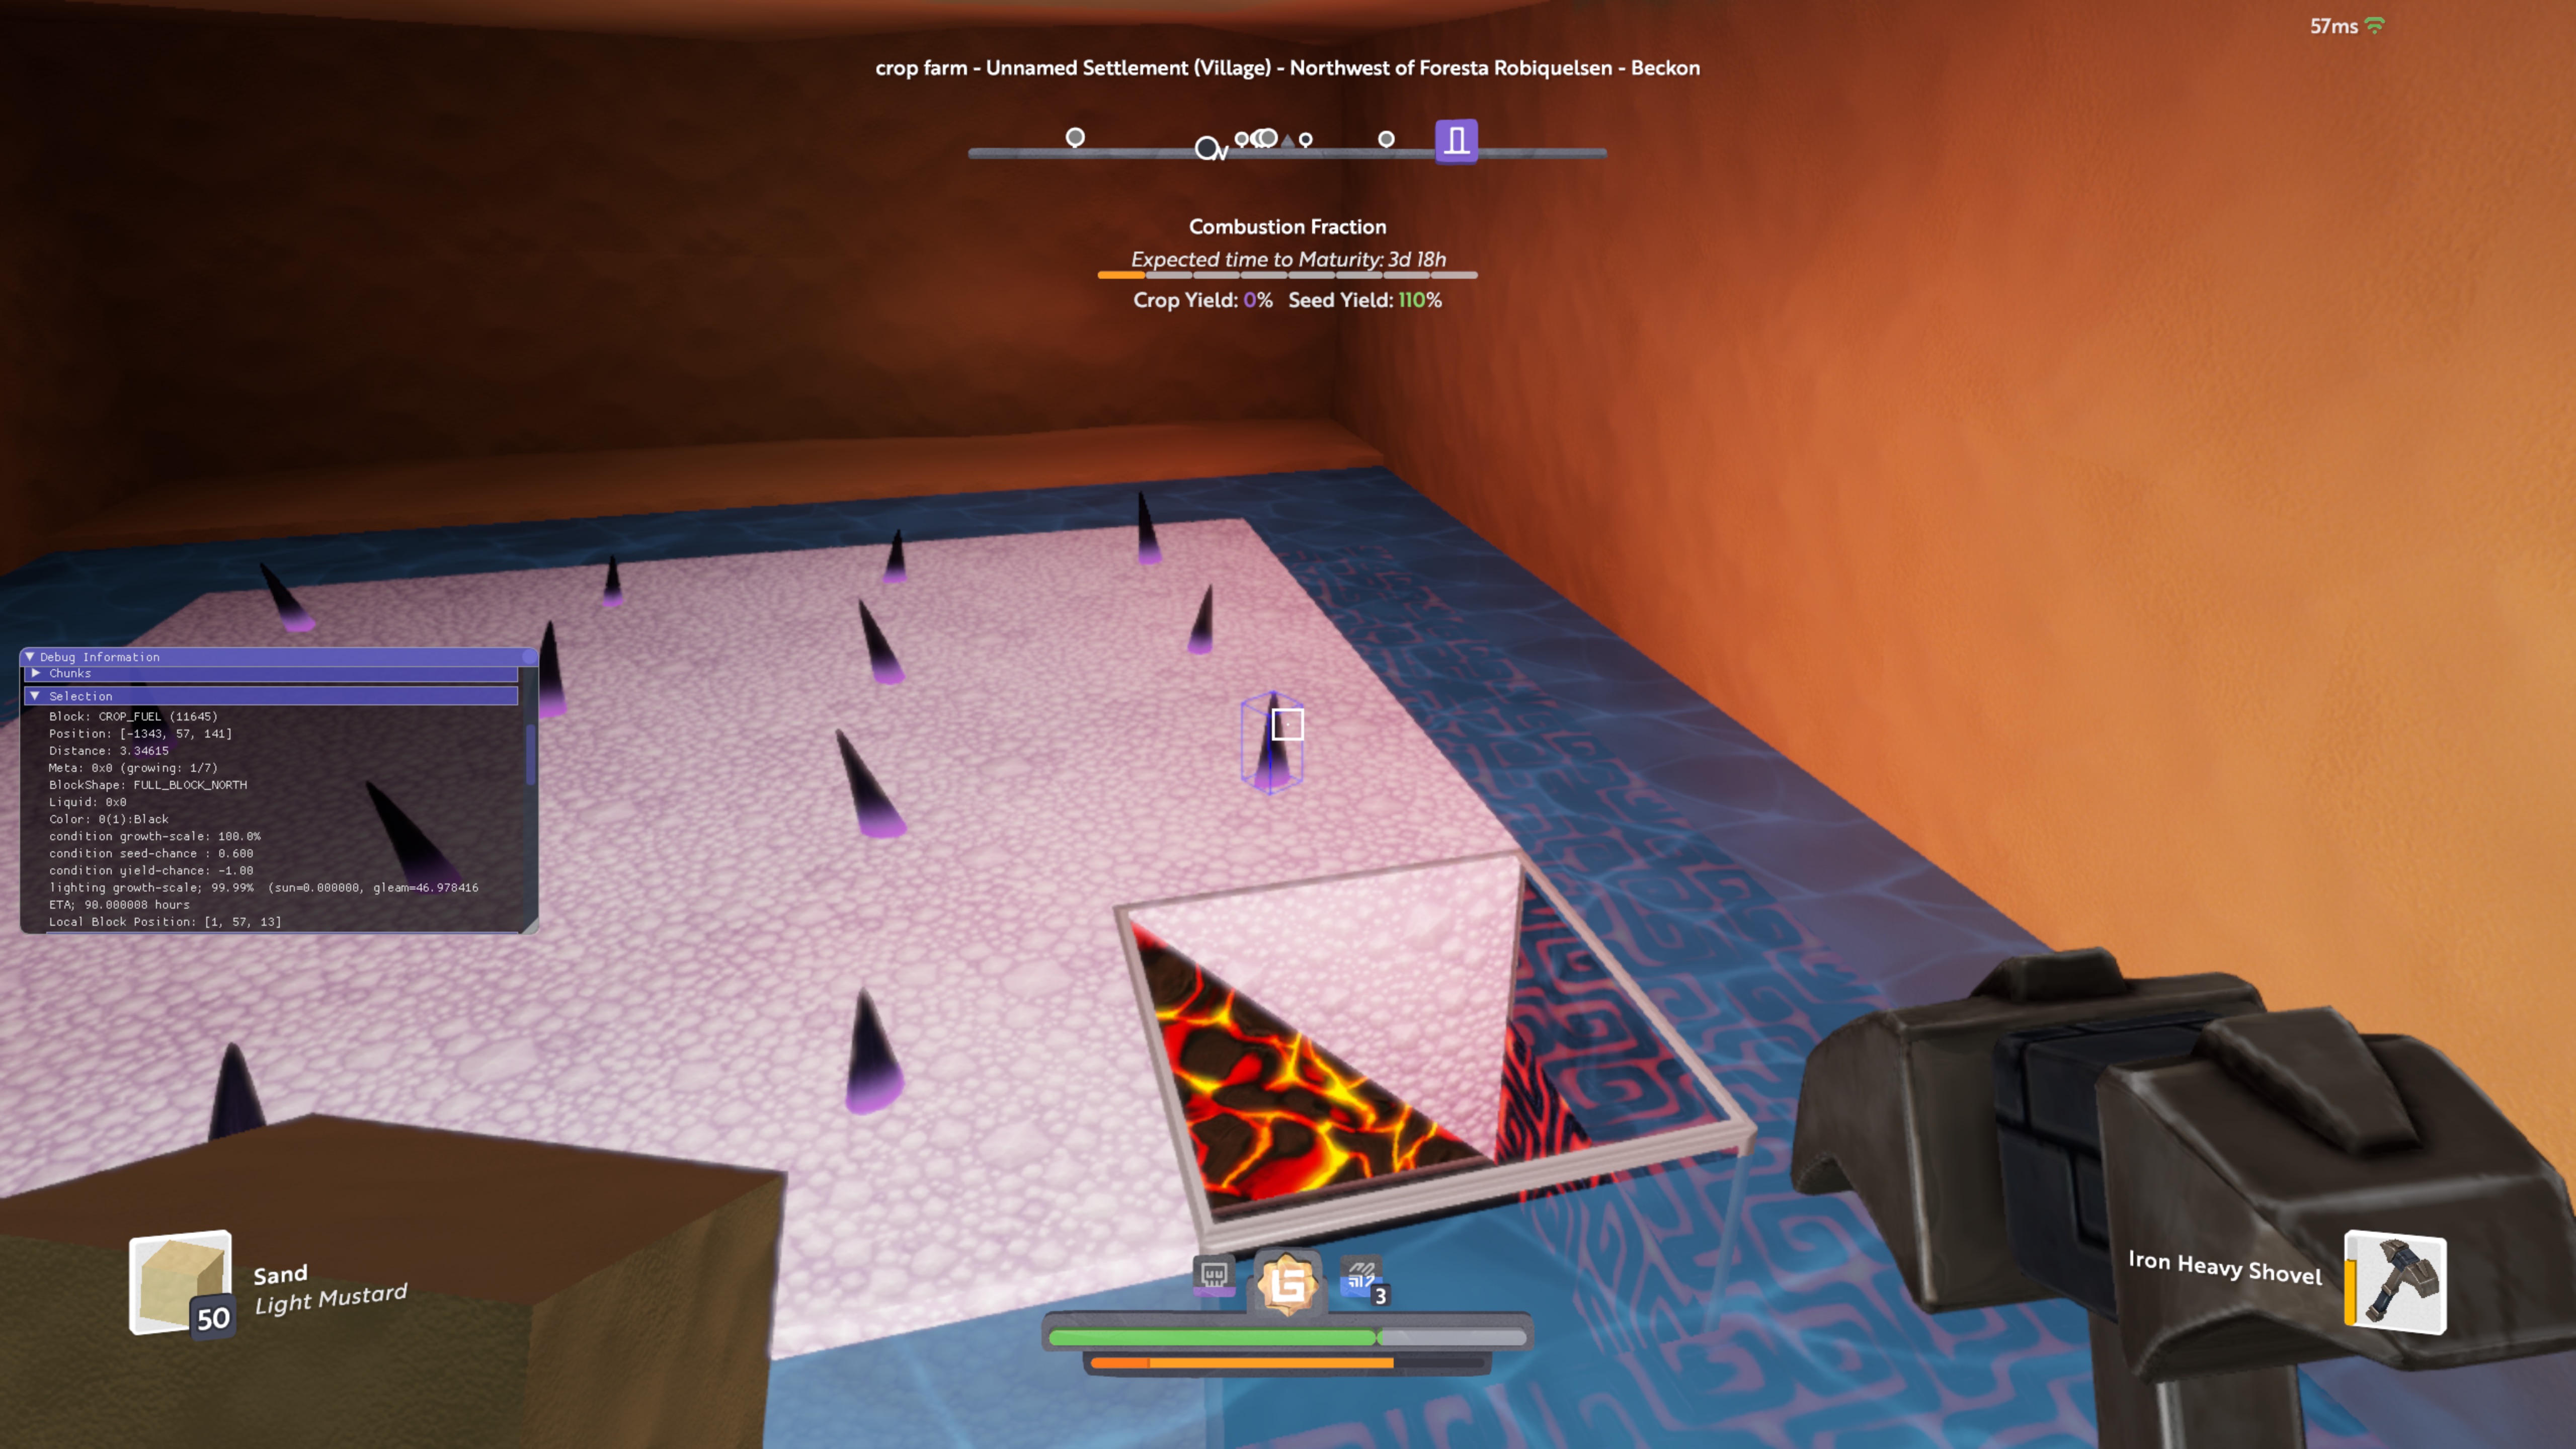
Here’s my layout for combustion fraction, optimized for seed yield. Since I don’t like the ancient corruption, I decided to chisel it and place water on top to hide it.
Hope the cross-section explains how I got water surrounding but still meet the lava requirement. Also the lava light isn’t overwhelming, when placed under the deco gravel. I also have debug menu on lower left corner. I use that to determine how much lighting (sunlight, or gleam light) the current highlight block is receiving.
As others have said even step chiselling the “3 near block” and then adding water\lava works well. It is essentially combining water and a different block in the same space.
You can also chisel the underside and place water that way too which is handy if there are two types of near blocks required other than the sown in block
Pop over to TNT Megahub at New Nixia outside the superstore there is a skyfarm portal there are some examples there both inside and out, also head over to the Kaos cafe and you find Futher optimised examples both on the roof and behind the building
You are welcome to come and look at my little farm as well for examples. Most are maximized for seed, but all yields are posted. I have a few examples of the inorganic to give you ideas as well. Since I am not that artistic at all, the blocks are pretty straight forward. I would be glad to answer any questions that come up.
The original crop rows were 4 wide since that is the optimum space, but then the farming part takes longer. At 3 wide, you can use an AoE tool and walk regular speed to harvest. Of course you can use speed brews to make everything faster, but I wanted to optimize for non-buffing initially. Additionally, the timing is still not exact, or at least I haven’t found the right combination of skill level / buffs - no buffs / tools to make planting and harvesting sync exactly up for run speed or higher. You have to stutter step…plant 5-7 then pause, etc.
I too made generous use of Mayumi’s wonderful guide posted above (link) Thanks so much Mayumi!
And also visited the farms of @Stretchious and others for some great examples.
You can find the farms below, and yes the rice one is over the top just for fun…there are more space/plot economical ones out there.
1,061N 1,092E on Alder
Fireborn Nomad City on Alder
Fireborn East from DK’s Ultima Tree → Speedhunts
Speedhunts portal from Duskmoor → head West
Several Fireborn hunt portals → Underminer → head West
PS Alder → Underminer
Hubbit Alder → Speedhunts
Code Gleam → Speedhunts