Here’s a “How Do!¡?” on creating prefabs. I assume nothing!
work in progress: I need to detail how to actually place these things in a world, and how to share them
1. World Building (opening the world builder)
I know it’s tempting to just open it via Steam, but resist the urge! Unfortunately, Steam doesn’t let us open both the world builder and the game at the same time, so we’ve gotta do it the hard way.
1a) In your Steam library, right click on Boundless, and select “Properties”.
1b) Then, navigate to the “Local Files” tab.
1c) Click on “Browse Local Files” to open up the directory Boundless was installed into.
1d) From the Boundless directory, navigate into the worldbuilder directory, and start the program called worldbuilder.
At this point, you should be greeted by this sleek window:
Protip: Create a shortcut to worldbuilder so you don’t have to go through this ever again!
2. Pre-Prefabrication (setting things up)
You’re going to want to have a world to play around in when working on your prefab; so let’s start with that:
2a) File → New → World
2b) Add a new “Custom Prefab” node (via the left side menu, towards the bottom under “Instance
Nodes”)
2c) In your newly added prefab node, click on “+ prefab”, which will be your first instance of this prefab set.
A little note: prefabs are sets of multiple prefab instances. For example you might want a “spooky tree” prefab; each instance would be a uniquely spooky tree that are randomly chosen from when placing your prefab in the world.
2d) Now it’s time to edit your prefab instance! Open Boundless (via Steam).
2e) In game, go to the main menu and select “Teleport to a World”
2f) Then switch the universe (to “builder”). You should see a “Prefab” world; select it!
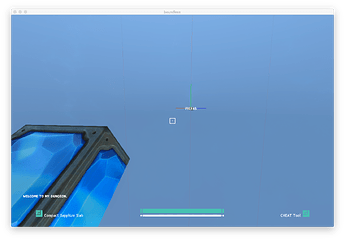
Boom, there’s your prefab! You may need to look around to find the center of the prefab, which is indicated by its name, and a very lonely block of gleam.
Protip: You will probably want to switch the game to windowed mode. You’ll be switching between the game and the world builder pretty often.
3. Prefabulous! (making a prefab instance)
That lonely gleam block you see in front of you is the center point of the prefab. That is where the prefab will be anchored to the world. Prefabs can be anchored to the terrain, or to cave ceilings - you can build in either direction! Note that prefabs have a footprint of up to 32x32 blocks, and you can build up or down 128 blocks; lots of room.
Switching Available Blocks
At this point, if you open up your inventory, you’ll notice it’s full of goodies …but only 32 of them ![]() Not to worry! We have access to nearly every block type for prefabs:
Not to worry! We have access to nearly every block type for prefabs:
In the world builder, locate your prefab node. Notice that there is an itemSet option; press it, and hover over the available ranges of items. Every time you choose an item set, your character’s inventory is swapped out with those items. Pick one, and then head back into game.
Grass
Rather than there being specific grass/dirt combination blocks like the rest of the world builder, you instead do what you do in the real game. Place some dirt (120,150 and 150,180), and then use grass seeds (30,60) to grow grass. The more seeds you plant on a block of dirt, the taller the grass gets.
Changing Colors
You can also switch up the colors used for the various blocks.
In the world builder, locate your world node. It has a myriad of options for colors for each block type. Play around!
Note that there is currently a bug: After changing colors, your character will become ‘stuck’ in game and unable to move. Make sure that you press “Teleport To” under the prefab instance, which will unstick your character.
Air Gaps:
If you want to create air gaps in your prefab, use the DELETECHUNK special block. When the prefab spawns in the world, any terrain at that location will be removed. Super handy for creating crawlspaces, cellars, and plenty of other cool things.
Now start buildin’!


 thanks for the nice tutorial.