This guide is for folk that have some world builder configs that they they wish to submit to the boundless.worlds repository. If you’re already familiar with git and GitHub, you can skip it
Alrighty! Brace yourself, it takes a bit to get set up initially ![]()
Initial Setup
1] sign up for GitHub (free plan) - note that the username you choose is what everyone will see and refer to you by.
2] Next, browse to the world builder repository, and fork it (click on ![]() top right). If it asks where to fork to, choose your username.
top right). If it asks where to fork to, choose your username.
3] Grab and install GitKraken. Set it up and walk through the initial setup (and email authentication).
4] Next, you’ll need to let it know about your GitHub account. Click on the gear in the top right, then the Authentication tab on the left, then on GitHub.com. Click on Connect to GitHub, follow the steps in your browser, and then switch back to GitKraken. Finally, click on “Generate SSH key and add to GitHub”
5] Now you can clone (download) the world builder repository. Go to the File menu → Clone Repo. Click on the GitHub.com tab, and you should see boundless.worlds in the list - select it. Make note of where it will clone the repo (feel free to choose a different directory if you like), and then hit Clone!
6] Almost there! Once it’s done cloning, hover over “remote” on the left bar and click the green + button. Click on GitHub, and choose turbulenz/boundless.worlds from the GitHub Repo dropdown. Click Add Remote. Whew!
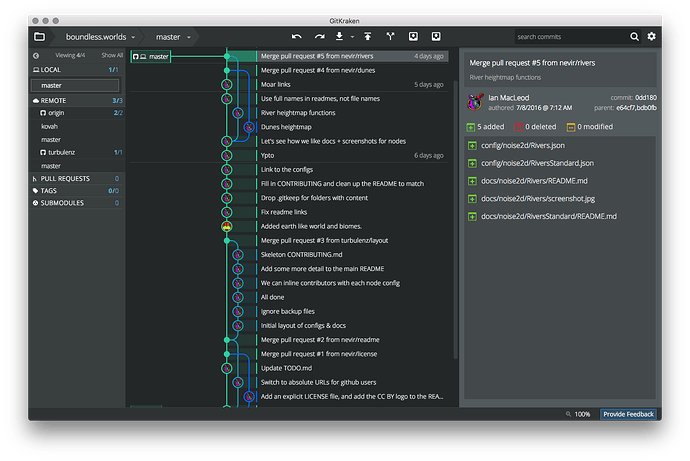
If all is well, you should see something like this:
You’re now set up to make contributions to the repo; and you shouldn’t have to do any of that again!
Making Contributions
Ok, so, let’s add your floating islands! Open up the directory where you cloned this repository to (in step 5 above). You should see a config directory, docs directory, and a handful of .md files.
Copy your custom node from Boundless’ own configs directory into this newly cloned copy. Place it into the appropriate directory under config. E.g. under biomes if it’s a biome node, noise3d if it’s a 3d noise node, etc.
Let’s say it’s a biome node, so you placed it at config/biomes/FloatingIslands.json. If you switch back to GitKraken, you should see a new entry at the top of the list called “// WIP” - click on it. You should see the file you just copied under “Unstaged Files” on the right:
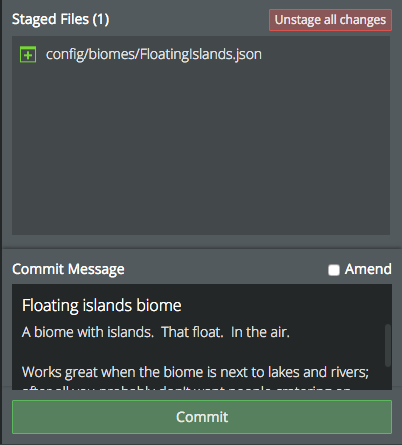
Click on “Stage all changes”, and the file will move down to the “Stages Files” list, and you can now fill in a commit message. A commit message describes the change that you are making (and everyone contributing can review these). You’ll want a quick one line summary, like “Floating islands biome”. And fill in the description with any details you want to share about your custom node (tips about how to use it, etc). Here’s an example:

Once you’re happy, hit Commit, and you’ll see your new commit added to the list in the center. Either right click on your new commit and choose Push, or click on the push icon: ![]() . This will upload your commit to GitHub.
. This will upload your commit to GitHub.
The final step (!) is to create a pull request, which is GitHub’s way of letting you share your commits with everyone else. Right click on the commit, and there should now be an option labeled “Start a pull request to turbulenz from origin/master” - choose that. It’ll let you review and deit the description. Once you’re happy, hit Create Pull Request. You’re done!
Your newly created pull request should show up at the repository - and we’ll be able to review your configs. Once everything’s in order, we’ll be able to accept your changes and merge them into the repository!

