Maximum Starberry Nerd Information

I’ve been testing my nut off trying to work out the most efficient layout (for SEED YIELD), within a 1 layer of a single plot (64 blocks), for each of the Starberry plants. Here is what I’ve found:

Before you get into this you need to know that when a Starberry plant says “near” in the description of what blocks are needed to maximise yields, the “near” counts the 24 blocks around the block the plant is planted on, in this layout:

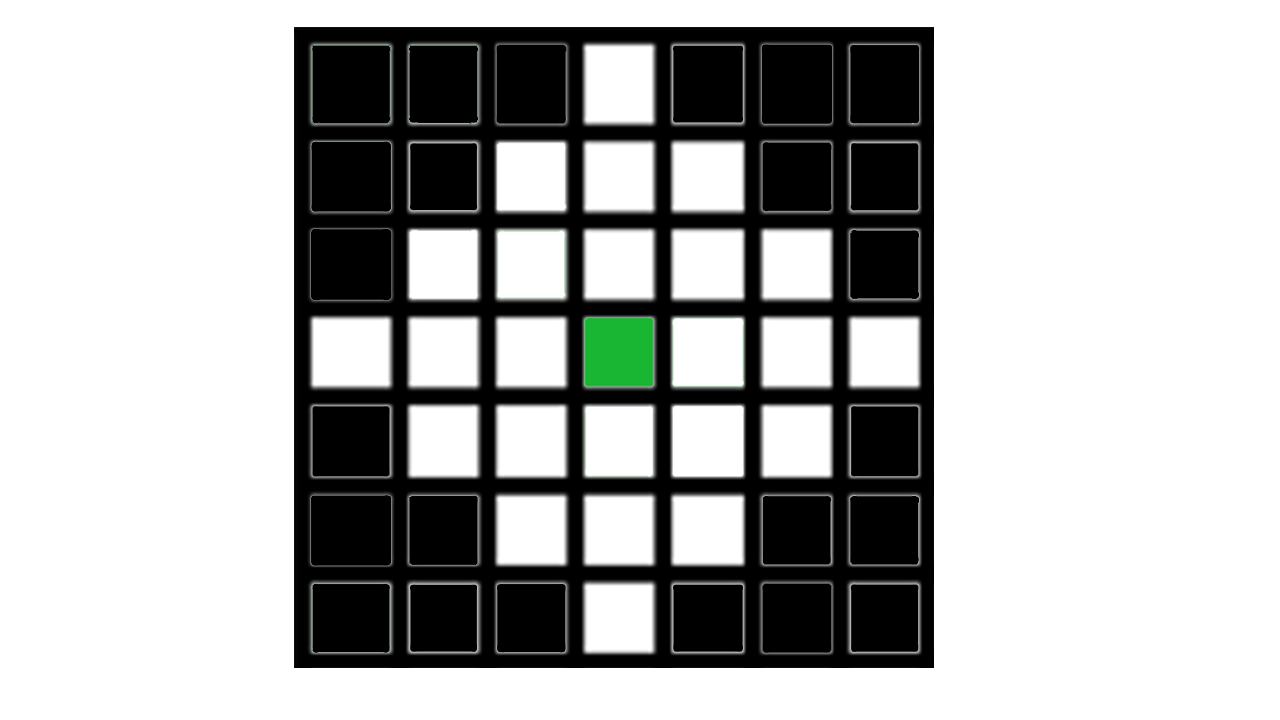
     _These layers can be stacked infinitely vertically but NOT horrizontally_

Starberries (SB):
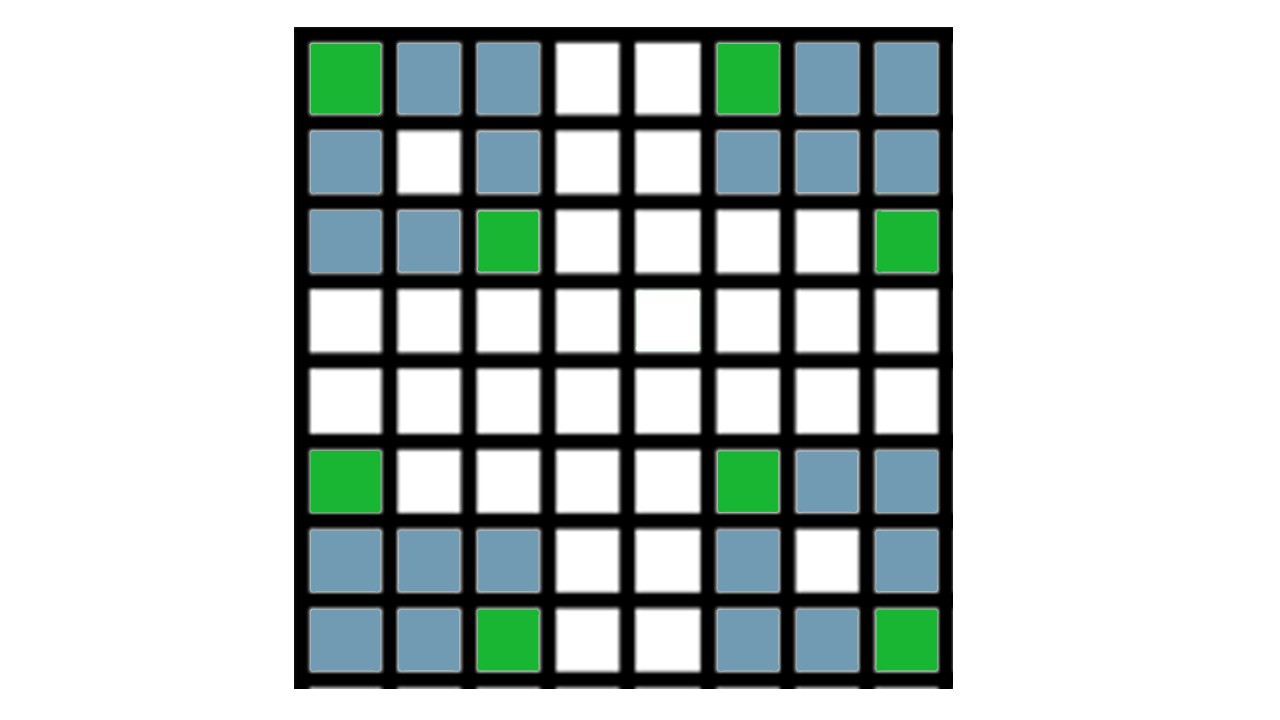
The most I’ve been able to squeeze into a single plot layer whilst still reaching maximum seed yield (112%) is 24 plants in the layout below. (Green = SB, Blue = Mould, White = Air)

I found that each SB plant needs 16 blocks of air and 3 Mould Blocks in its “near” radius to reach maximum seed yield.

Glossy Starberries (GSB)
The most I’ve been able to squeeze into a single plot layer whilst reaching max seed yield (110%) is 14 plants in the layout below. (Green = GSB, Blue = Tangle, White = Air)

I found that each GSB needs 18 blocks of air and 4 Tangle Blocks in its “near” radius to reach maximum seed yield.

Juicy Starberries (JSB):
The most I’ve been able to squeeze into a single plot layer whilst reaching max seed yield (106%) is 8 plants in the layout below. (Green = JSB, Blue = Thorns, White = Air)

I found that each JSB needs 18 blocks of air and 6 Thorn Blocks in its “near” radius to reach maximum seed yield.

TIP: The bottom layer can be tricky to plant the seeds on if its only a one block gap, but you can just copper chisel the foliage block so you are able to basically plant the seed on the side of the block!

You can do this to all the blocks if you find it tricky to place the seeds, as it increases the surface area in which you need to connect with!

DISCLAIMER: These are the results of 1 days worth of testing on a trial and error basis, if you know of any information to wrong or if you can fit in any more plants (whilst keeping the maximum seed yield) please lemme know and I can change it!

29 Likes

Well done Nerd. You earned a medal.

1 Like

Thanks for pics, too. :]

1 Like

@Buugi Lit

@Fallon I did it without the pics but I couldn’t even understand it myself, so I redid it with pictures :+1:

3 Likes

This all looks correct but when you lay it out you will need more plots because you have berries on the edge then you need to have air before you do another layout so when you do a field you might get 8 plants per plot for one plot but only 6 plants per plot when you have two adjacent plots planted.

2 Likes

Yeh this layout is designed to fit within one plot and be stacked vertically. So you can get 4 layers into 1 plot with the bottom berries being on the bottom layer (1) and the top foliage being on the top layer (8) :slight_smile:

Which you can infinitely stack them on top of each other, but just depends how easily you want to be able to farm them, i suggest only stacking up to the height in which you can reach with your level of the control skill

You’re right tho, you can’t stack these side by side!

Thank you King Nerd… I look forward to your testing info on the other farming crops… :slight_smile:

Yep you can do this, but I would think the ones on the bottom are going to be hard to plant and harvest since you need to see the bottom of the foliage to plant them. Personally I have only gotten 3 levels in a plot so far so I can get to all of them.

1 Like

Chisel the bottom layer with a copper chisel, then you can basically plant them on the side of the block :wink:

1 Like

actually I did see that in test and forgot about it. . that would work very well. .

1 Like

Indeed, I added it to the OP - if you aren’t worried about the aesthetic of the build, chiselling it increases the surface area in which you need to connect with to plant :ok_hand:

I have floating clumps of foliage and other resources. . I do not think I am too worried about aesthetics. . :joy:

I actually may do this on the higher levels also after I harvest the existing crop. . Might make it easier to get to them also. .

2 Likes

Hahaha fair enough, i’d just chiselled all my layers, SO much easier! Plus i can clearly see the higher layers if they are ripe or not

1 Like

since everything does not ripen at the same time it is good to see if enough is ready to justify harvesting or not.

1 Like

I agree, I always harvest if I see a ripe one atm. Later down the line I will prob just wait for a full cycle

I wait until there are enough which is normally twice the normal maturity time.

I WANT MY 110% :triumph:

1 Like

I feel you, need to squeeze everything out of the farming stuff! :joy:

I got 104% on my exotic yams this morning and was not happy. .

1 Like

I’ll be moving onto ground farming next, just need more plots lol

Hmm. 104% on exotic yams? Mine are 110% all over. Not sure what you’re doing wrong… lol